지난번 pglogical을 이용한 DB 이중화에 대해 알아보았었는데, pglogical 자체에는 primary-secondary 구조에서 auto failover나 secondary 서버에서 read only로 설정해 주는 기능이 없었다.
그러던 중 PostgreSQL 자체 replication 기능을 이용하면서 auto failover 처리를 해줄 수 있는 repmgr을 알게 되었다.
이번 포스팅은 Rocky Linux 8 환경에 PostgreSQL 14를 repmgr을 이용하여 이중화를 구성하는 방법에 대해 포스팅하려고 한다.
설치에 앞서 primary-secondary를 repmgr에서는 primary-standby로 표현하고 있기 때문에 primary-standby로 표현하기로 한다.
1. repmgr 설치하기
본 과정은 primary로 설정할 서버와 standby 서버로 설정할 서버 모두 진행하여야 한다.
curl https://dl.enterprisedb.com/default/release/get/14/rpm | sudo bash
sudo dnf install repmgr14
우선 PostgreSQL은 이미 설치된 상태로 가정하고 repmgr을 설치한다.
PostgreSQL 14가 아닌 다른 버전이 설치되어 있다면 repmgrXX에 들어가는 숫자를 맞춰주면 되는데 현재 최신 버전인 repmgr5.3.2는 9.4 버전부터 14 버전까지 지원한다.
ln -s /usr/pgsql-14/bin/repmgr /usr/bin/repmgr
ln -s /usr/pgsql-14/bin/repmgrd /usr/bin/repmgrd
repmgr 설치가 완료되었다면 repmgr을 쉽게 사용할 수 있도록 symbolic link를 생성해 준다.
symbolic link를 생성하지 않고 pgsql의 bin을 PATH에 등록하거나 명령어를 사용할 때마다 /usr/pgsql-14/bin/repmgr을 입력하여 사용하는 방법도 있다.
vi /etc/sudoers

postgres ALL=NOPASSWD: /usr/bin/systemctl stop postgresql-14.service, \
        /usr/bin/systemctl start postgresql-14.service, \
        /usr/bin/systemctl restart postgresql-14.service, \
        /usr/bin/systemctl reload postgresql-14.service, \
        /usr/bin/systemctl start repmgr14.service, \
        /usr/bin/systemctl stop repmgr14.service
다음은 /etc/sudoers 파일을 수정하여 postgres 계정이 PostgreSQL 또는 repmgr을 패스워드 없이 시작, 종료 등을 할 수 있도록 한다.
2. primary 서버 설정하기
primary로 설정할 vm1의 IP는 192.168.182.129이다.
서버 설정에 앞서 테스트로 사용할 DB 유저와 데이터베이스를 생성한다.
createuser --superuser {유저명}
createdb --owner={유저명} {DB명}
다음으로 postgresql.conf 파일을 수정해 준다.
vi /var/lib/pgsql/14/data/postgresql.conf

max_wal_senders = 10
max_replication_slots = 10
wal_level = 'replica'
hot_standby = on
archive_mode = on
archive_command = '/bin/true'
wal_log_hints = on
shared_preload_libraries = 'repmgr'
사실 이중화를 구성할 경우 max_wal_senders와 max_replication_slots는 2로 설정해줘도 되지만, 기본적으로 설정된 값이 10이기 때문에 그냥 주석 해제만 해주면 된다.
max_wal_senders와 max_replication_slots는 연결하려는 노드보다 하나 더 많게 설정해주면 된다.
그다음으로는 pg_hba.conf를 수정해 준다.
vi /var/lib/pgsql/14/data/pg_hba.conf

# for repmgr
local	replication	{유저명}			trust
host	replication	{유저명}	127.0.0.1/32	trust
host	replication	{유저명}	{IP대역}/24	trust
local	{DB명}		{유저명}			trust
host	{DB명}		{유저명}	127.0.0.1/32	trust
host	{DB명}		{유저명}	{IP대역}/24	trust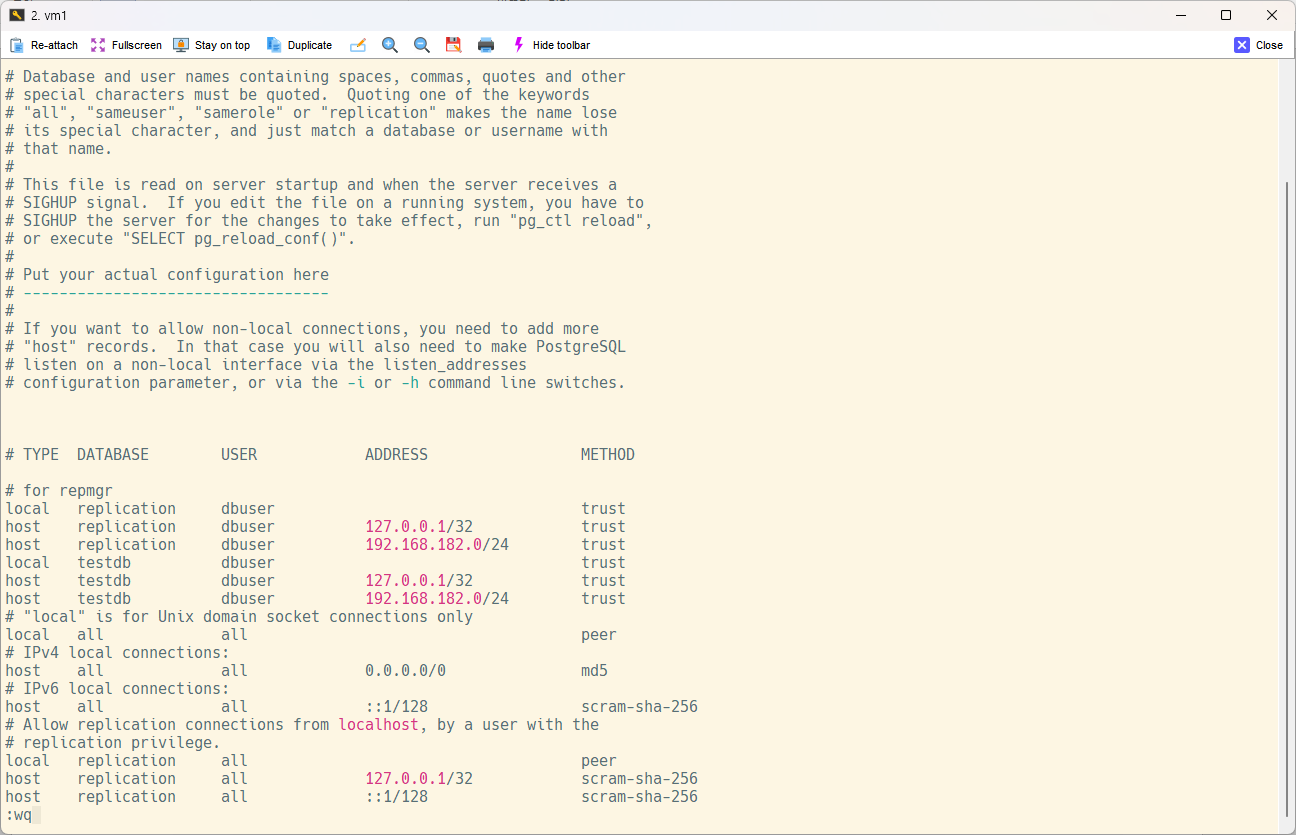
METHOD를 trust로 설정하여 데이터베이스 접속 시 패스워드를 요구하지 않도록 설정한다.
필요에 따라서 이 부분을 패스워드 인증으로 변경 후 .pgpass를 이용하는 방법도 있다.
다음으로는 repmgr.conf를 수정해주면 된다.
vi /etc/repmgr/14/repmgr.conf

node_id=1
node_name='{노드명}'
conninfo='host={IP주소} user={DB명} dbname={유저명} connect_timeout=2'
data_directory='/var/lib/pgsql/14/data'

service_start_command = 'sudo systemctl start postgresql-14.service'
service_stop_command = 'sudo systemctl stop postgresql-14.service'
service_restart_command = 'sudo systemctl restart postgresql-14.service'
service_reload_command = 'sudo systemctl reload postgresql-14.service'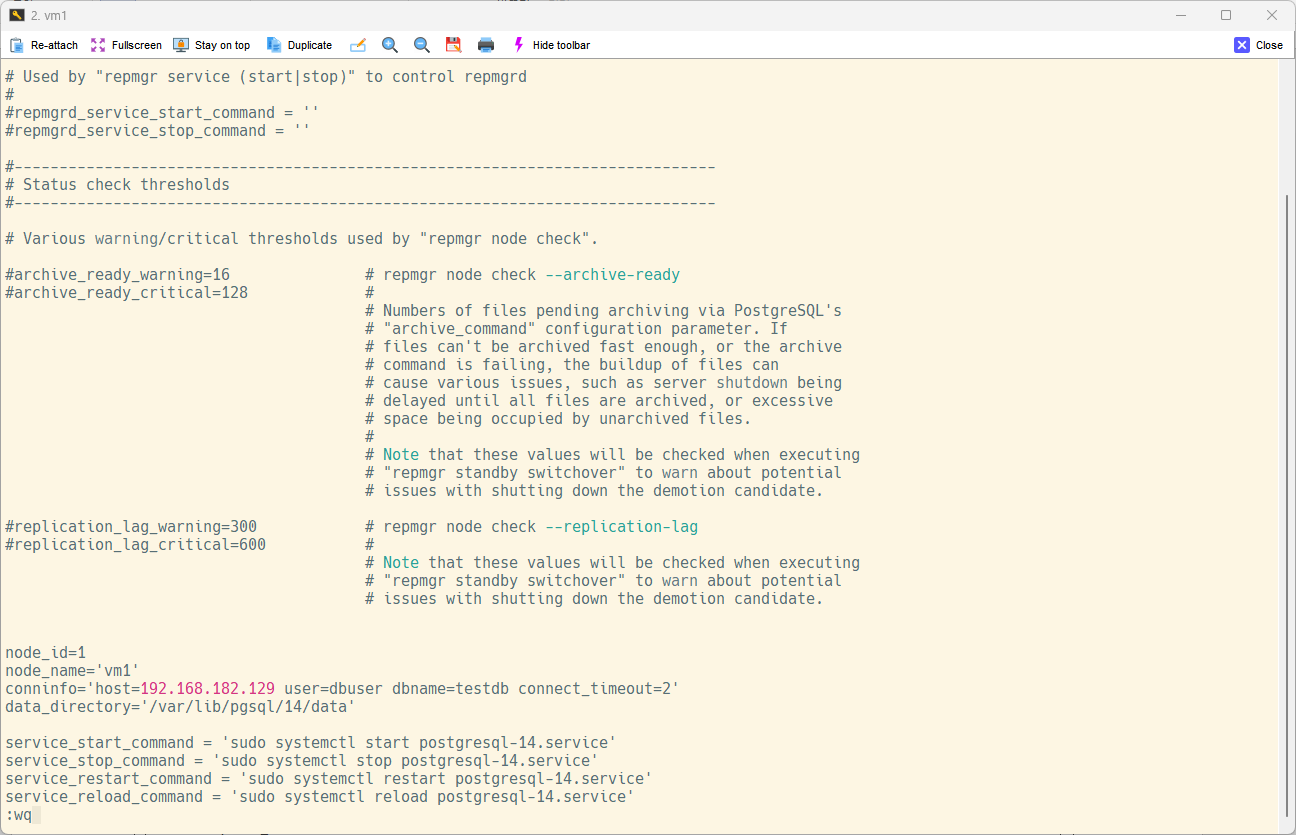
현재 환경에 맞춰 repmgr.conf를 수정해주면 된다.
node_name은 고유한 문자열로 설정해주면 되는데, repmgr에서는 서버의 호스트명을 사용하는 것을 권장하고 있다.
설정 파일 수정이 모두 끝나면 이제 repmgr에 현재 서버를 primary로 등록해주면 된다.
repmgr primary register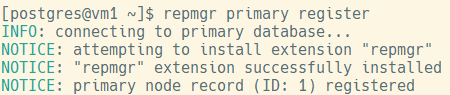
repmgr cluster show
등록 후 위 명령어를 입력하면 현재 repmgr에 등록된 클러스터를 조회할 수 있다.
정상적으로 192.168.182.129 서버가 primary 상태로 등록된 것을 확인할 수 있다.
3. standby 서버 설정하기
standby 서버는 primary 서버에 등록된 데이터를 그대로 복제해 오기 때문에 repmgr.conf만 수정 후 repmgr에 standby로 등록해주면 된다.

standby로 설정할 vm2의 IP는 192.168.182.131이다.
PostgreSQL이 실행 중이면 안되니 PostgreSQL이 실행 중이지 않은지 확인한다.

vi /etc/repmgr/14/repmgr.conf

node_id=2
node_name='{노드명}'
conninfo='host={IP주소} user={DB명} dbname={유저명} connect_timeout=2'
data_directory='/var/lib/pgsql/14/data'

service_start_command = 'sudo systemctl start postgresql-14.service'
service_stop_command = 'sudo systemctl stop postgresql-14.service'
service_restart_command = 'sudo systemctl restart postgresql-14.service'
service_reload_command = 'sudo systemctl reload postgresql-14.service'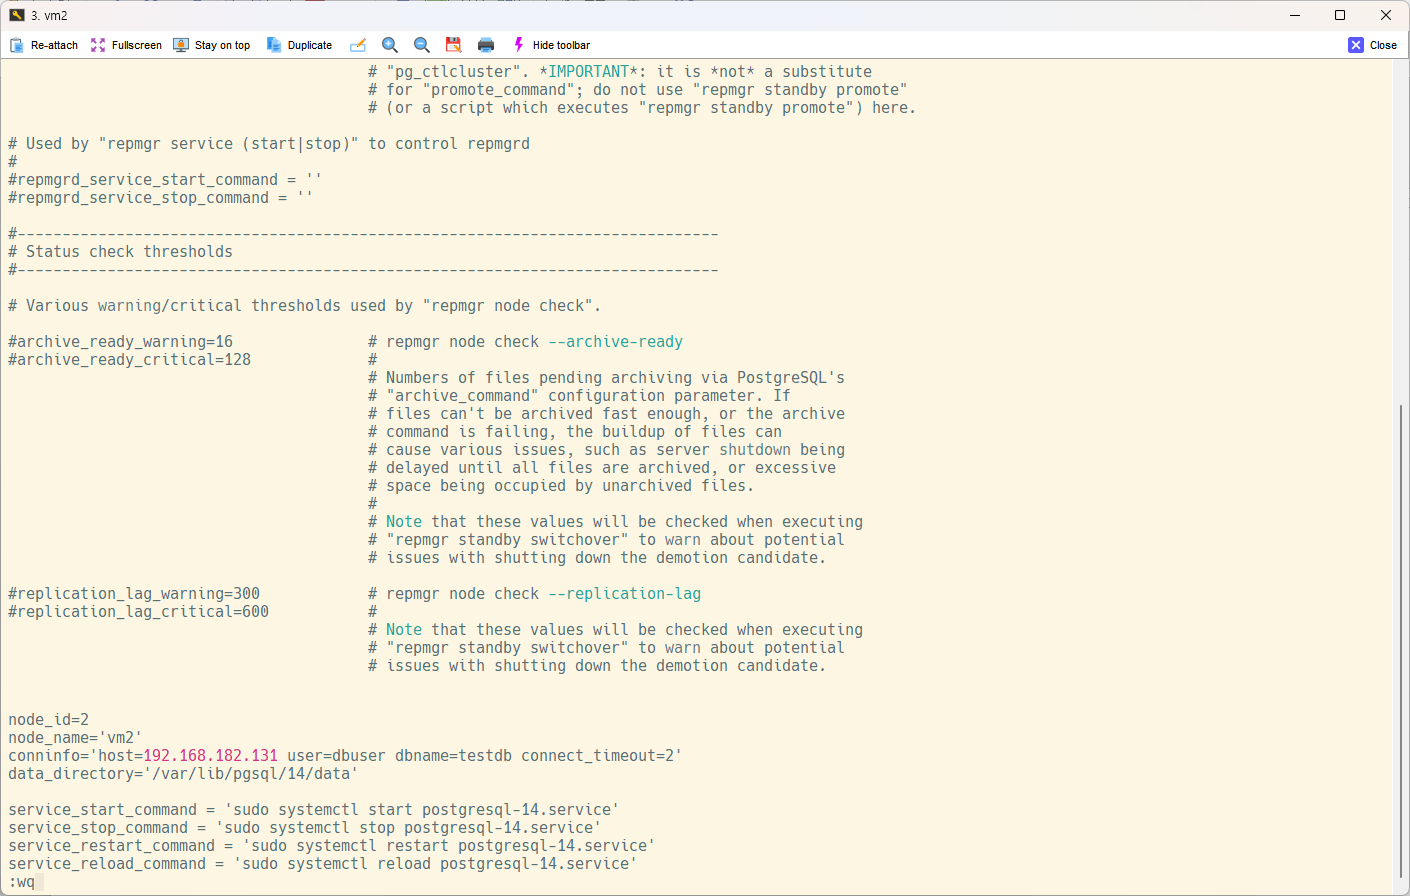
repmgr.conf의 설정이 끝났으면 primary 서버에 있는 데이터를 복제한다.
repmgr -h {primary IP} -U {유저명} -d {DB명} standby clone --force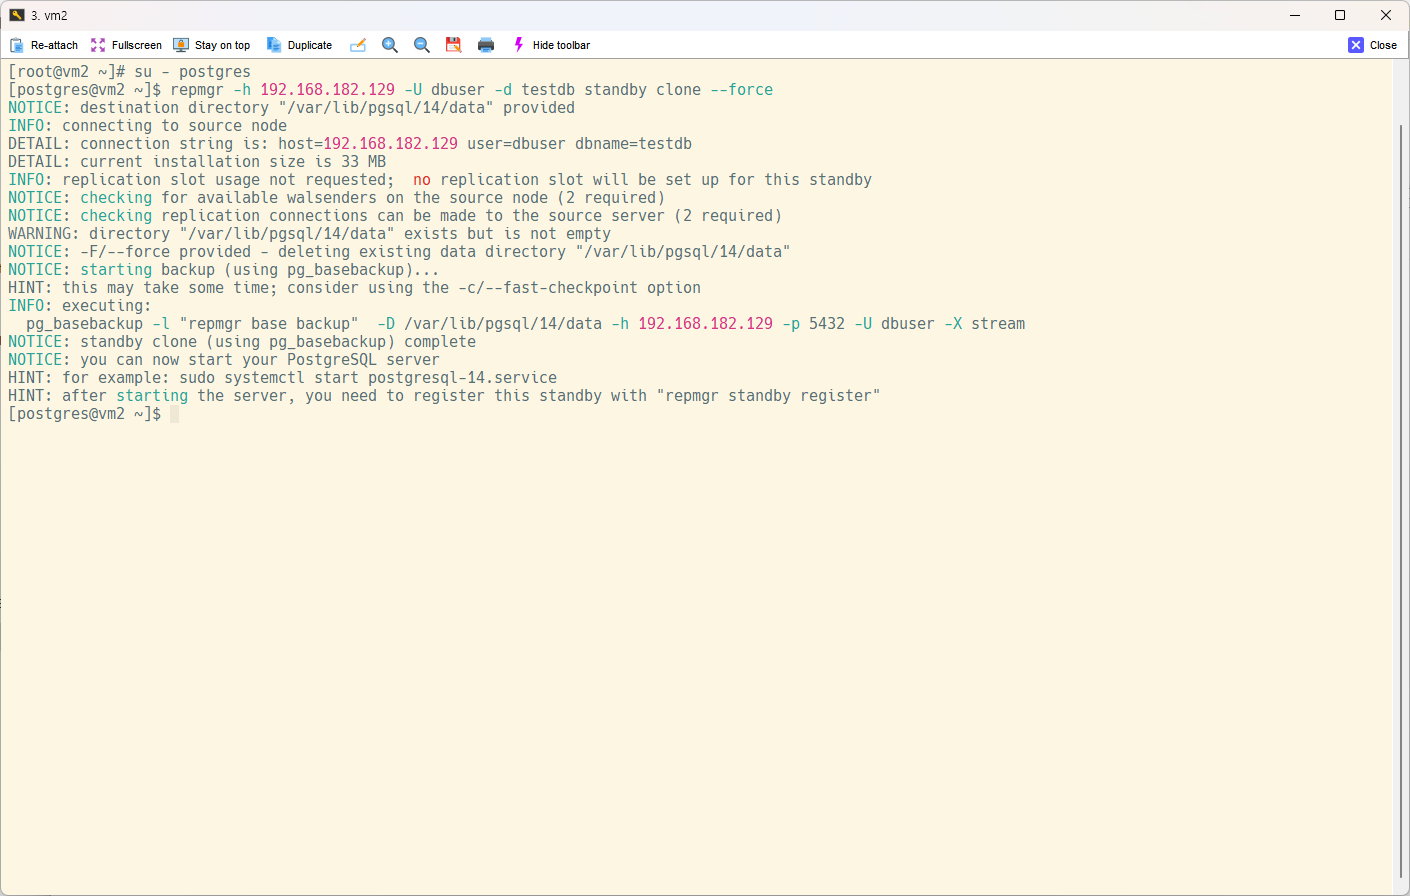
standby로 등록할 서버에서 initdb로 클러스터를 생성하지 않았을 경우에는 --force 옵션을 빼도 무방하다.
위와 같이 정상적으로 primary 서버의 데이터를 가져왔으면 PostgreSQL을 실행한 후, repmgr에 standby로 등록해 준다.
sudo systemctl start postgresql-14.service
repmgr standby register

repmgr cluster show를 사용하여 정상적으로 192.168.182.131 서버가 standby 상태로 등록된 것을 확인할 수 있다.
4. 이중화 테스트하기
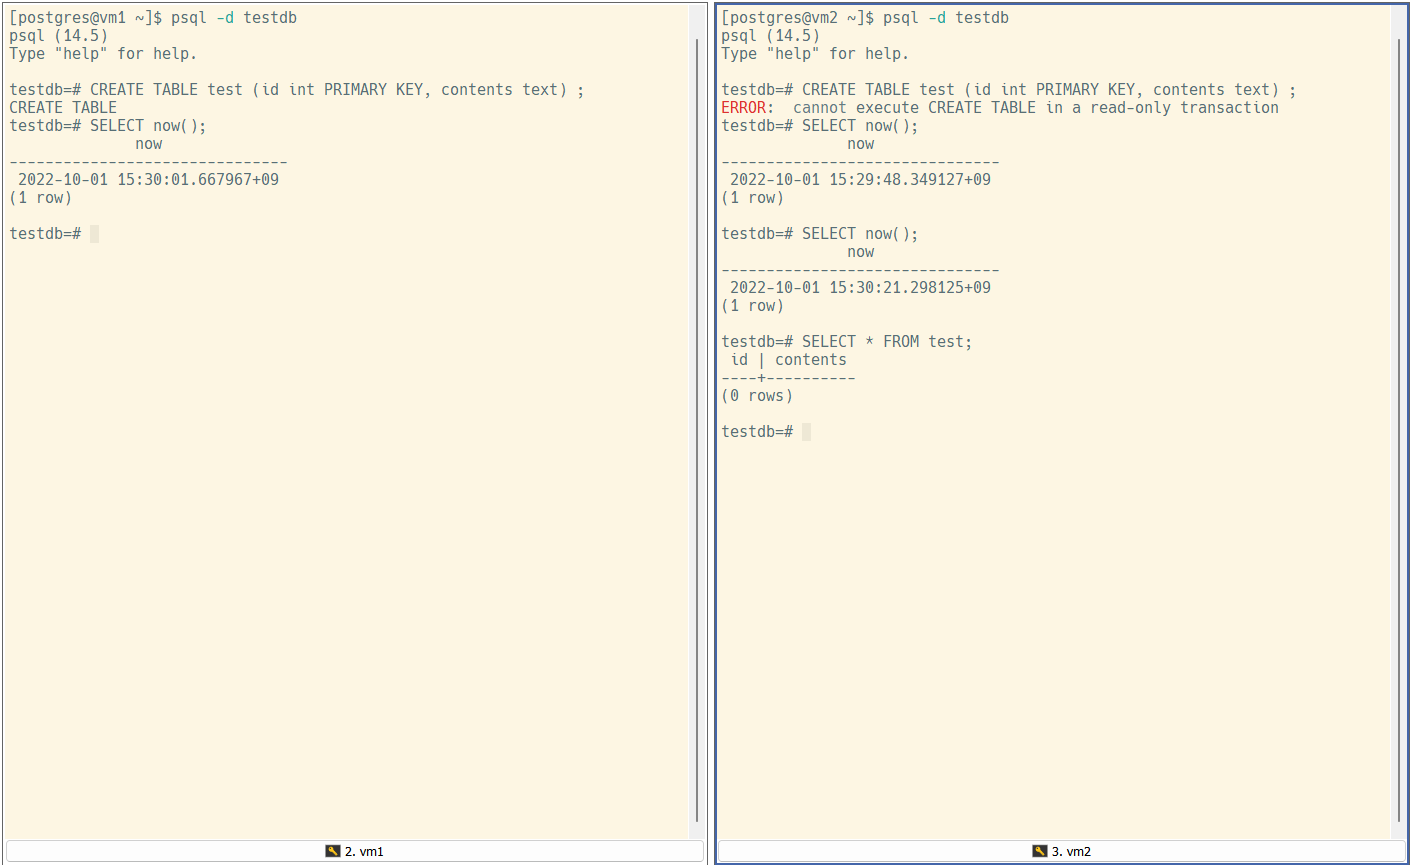
위 과정까지 완료했다면 vm1은 주 서버, vm2는 보조 서버로 등록되어 vm1에서는 DML, DDL, DCL의 제약이 없으나 vm2에서는 read-only 트랜잭션으로 제약이 존재하는 것을 확인할 수 있다.
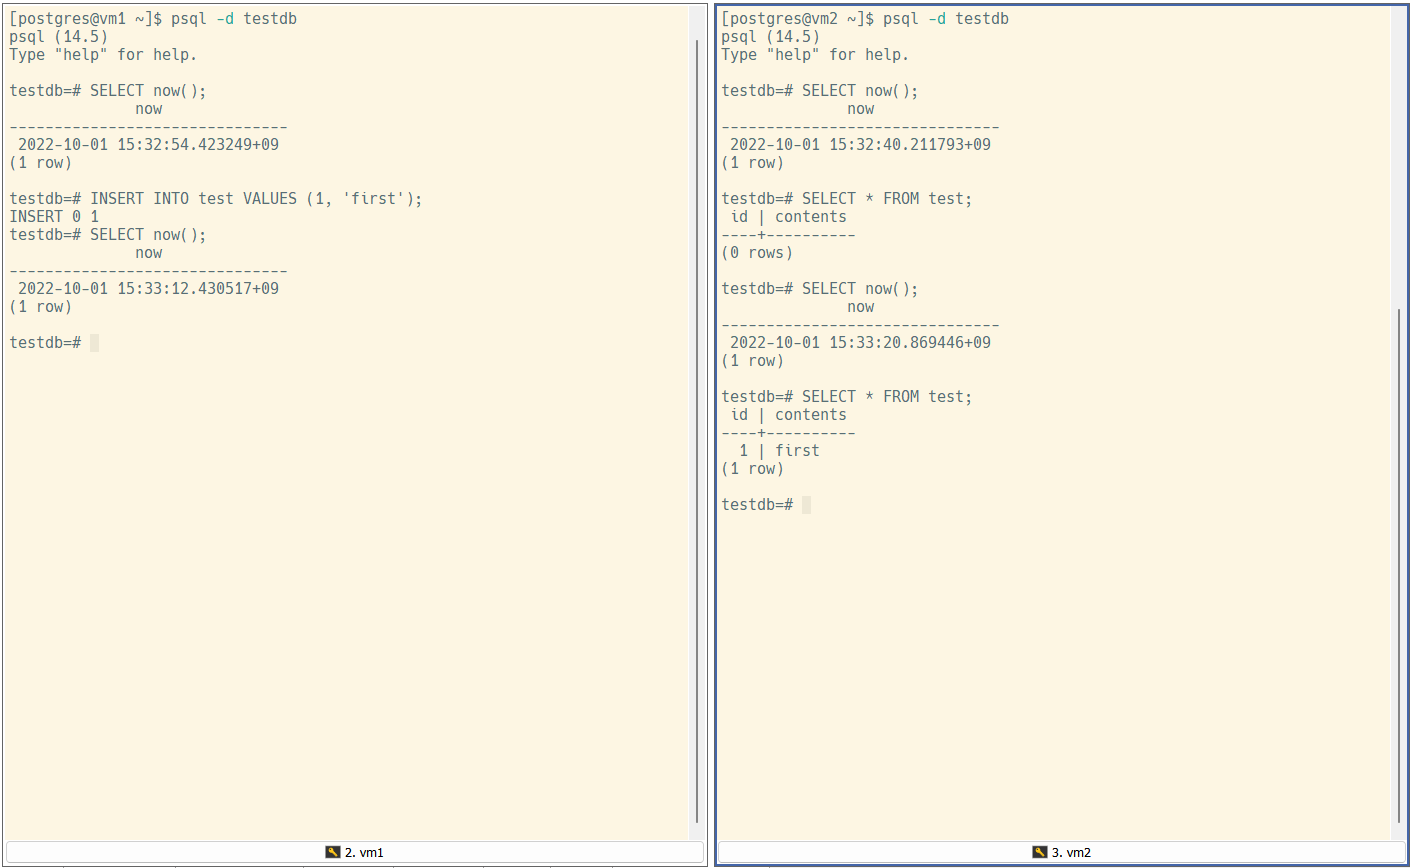
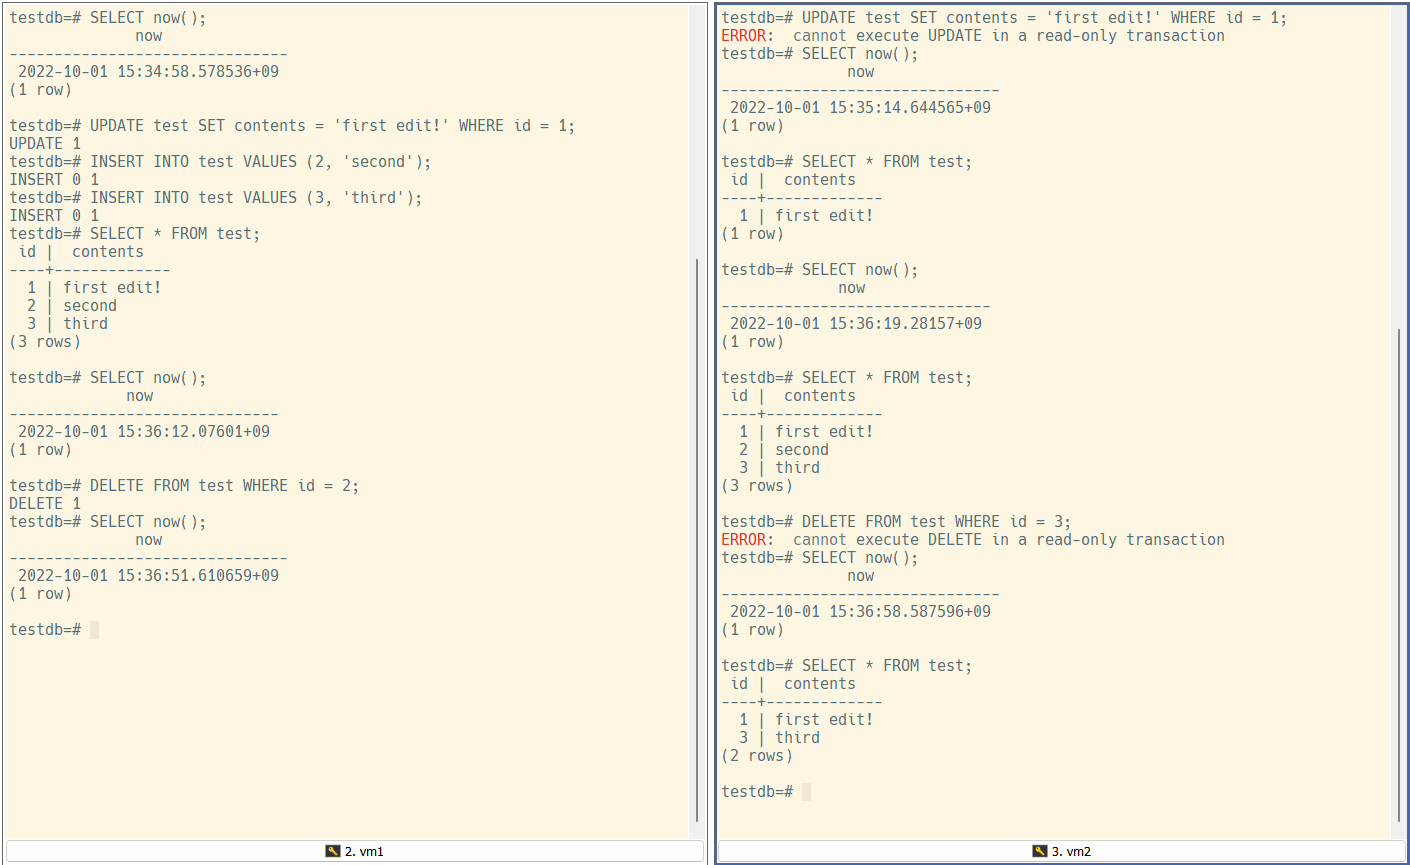
양 서버에서 DB 동기화가 제대로 수행되고 있는 것을 확인할 수 있다.
여기까지의 과정은 DB replication의 설정이었고, auto failover에 대해서는 다음 포스팅에서 알아보도록 하겠다.